
SDX 3.2.5 Release Notes
Adding a Container
| Dispatch > Adding a Container |

A Dispatch Container can be added directly from the Dispatch Dashboard after clicking on the icon showing the number of containers at a location in the Container column. Simply click the  on the Dispatch Containers Dialog Box. Doing so will open the Add Dispatch Container Dialog Box, pictured above.
An Internal Number can be assigned. Checking the  box will make this container inactive.
The yard for this container can be assigned by clicking the 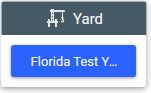 blue button in the yard box. This will open up a drop down menu displaying all yards at your company. The assigned yard can be changed in this drop down.
The Container Type can be assigned using the blue button in the Container Type box. This will open a drop down menu displaying all container types available. The container type can be selected in this drop down.
The Status for this container can be assigned using the blue button in the Status box.This will open up a drop down menu displaying available statuses. The status can be changed in this drop down.
The Commodity for this container can be selected in the Commodity Box by clicking the  button. This will open the Lookup Commodity box. The Commodity can be assigned from this box.

Lookup Commodity Box. |
The date the container is in service will default to the current day, but can be changed by clicking on the date in the In Service Box.
Assign the Description, VIN Number, Tag Number, GPS Unit ID and Notes in the appropriate fields.
The Location for this container can be set by customer or by yard in the 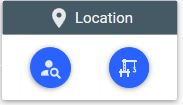 box. To change the customer click the
  button. This will open a customer search screen similar to the one that appears in the Buy Module. Simply select the customer and click
 . The yard can be changed by clicking the
  button. This will open the Yard Location Lookup box. After selecting the yard click the button.

Yard Location Lookup |